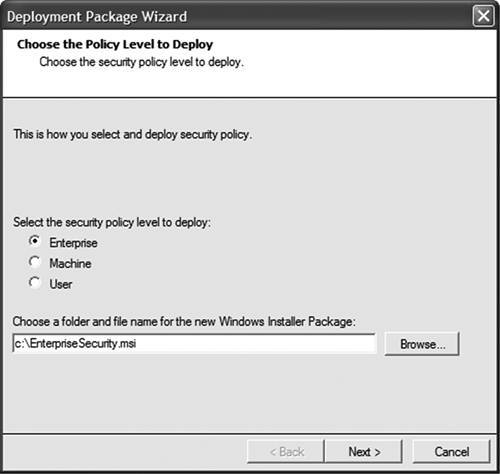
Deploying Policy to User MachinesAfter you have figured out which policies you need to deploy throughout your enterprise, how are you going to get them from your administration machine onto user machines? Fortunately, it is no different from deploying any other application: You can create an MSI installation file, create a batch file to set up security policy from the command line, or write a C# program. Creating an MSI InstallerCreate the Enterprise policy level you want to deploy on your machine using the mscorcfg.msc management tool. When you have a satisfactory policy, right-click the Runtime Security Policy node in the tree view and select Create Deployment Package. The dialog shown in Figure 19-11 will appear. Figure 19-11. The policy Deployment Package Wizard.
The wizard will then create an installation script that you can deploy the same way you deploy any other application throughout your enterprise, whether via System Management Server or Group Policy, to automatically update user machines, or simply putting the installation script up on a share and letting users click it themselves. Creating a Batch FileAs discussed in Chapter 18, "Server Data Scenarios," you can use the caspol.exeutility to change security policy. Caspol.exe is usually found in the Windows\ Microsoft.NET\Framework\v2.0 directory. Caspol.exe is extremely flexible and has many options, but for our purposes we just discuss how to view and edit a policy level. To view a policy level, the syntax is as follows: caspol.exe -<level> -listgroups where <level> can be enterprise, machine or user. For example: C:\> caspol -machine -listgroups Microsoft (R) .NET Framework CasPol 2.0 Copyright (C) Microsoft Corporation. All rights reserved. Security is ON Execution checking is ON Policy change prompt is ON Level = Machine Code Groups: 1. All code: Nothing 1.1. Zone - MyComputer: FullTrust 1.1.1. StrongName -: FullTrust 1.1.2. StrongName -: FullTrust 1.2. Zone - Intranet: LocalIntranet 1.2.1. All code: Same site Web 1.2.2. All code: Same directory FileIO - 'Read, PathDiscovery' 1.3. Zone - Internet: Internet 1.3.1. All code: Same site Web 1.4. Zone - Untrusted: Nothing 1.5. Zone - Trusted: Internet 1.5.1. All code: Same site Web As you can see, every group is numbered to indicate its position in the code group hierarchy. To add a child group, we need to give caspol the number of the parent group, the membership condition of the group, and the permission set granted by this group. The syntax is as follows: caspol.exe -<level> -addgroup <parent> <condition> <permission set> where <permission set> can be Nothing, Execution, Internet, Local Intranet, or FullTrust. The <condition> is somewhat more complicated due to the number of possible membership conditions for a code group. Typically. you will want to pick one of the following:
To create a code group that includes all Office documents, use this customfile.xml: <IMembershipCondition class="Microsoft.Office.Security.Policy. OfficeDocumentMembershipCondition, msosec, Version=7.0.5000.0, Culture=neutral, PublicKeyToken=b03f5f7f11d50a3a"/> To create a level-final or exclusive code group, add levelfinal on or exclusive on to the end of the command line. For example, to create a policy in the Machine level that fully trusts all files on a particular intranet site, you could use caspol.exe like this: caspol.exe -machine -addgroup 1.2 url http://accounting/* FullTrust Writing a C# ProgramThe System.Security namespace provides objects that enable you to manipulate all aspects of the security system programmatically. To set a security policy, we first obtain the three persisted policy levels (Enterprise, Machine and User are saved to disk; the Application policy is created dynamically whenever an application domain is created). We then create a new code group by associating a membership condition with a permission set. Finally, we search the Machine policy for the Intranet group and add a child group, as in Listing 19-1. Listing 19-1. Programmatically Modifying Security Policy
using System.Collections;
using System.Security;
using System.Security.Policy;

public class ChangePolicy
{
  static public void Main()
  {
    PolicyLevel enterprisePolicyLevel;
    PolicyLevel machinePolicyLevel;
    PolicyLevel userPolicyLevel;
    ZoneMembershipCondition zone;
    CodeGroup accountingServerGroup;
    UrlMembershipCondition accountingServerCondition;
    PolicyStatement policyStatement;
    PermissionSet fullTrust;
    IList children;
// Obtain the three policy levels:

    IEnumerator policyEnumerator = SecurityManager.PolicyHierarchy();
    policyEnumerator.MoveNext();
    enterprisePolicyLevel = (PolicyLevel)policyEnumerator.Current;
    policyEnumerator.MoveNext();
    machinePolicyLevel = (PolicyLevel)policyEnumerator.Current;
    policyEnumerator.MoveNext();
    userPolicyLevel = (PolicyLevel)policyEnumerator.Current;

// Create a new group by combining a permission set with a
// membership condition:

    fullTrust = machinePolicyLevel.GetNamedPermissionSet("FullTrust");
    policyStatement = new PolicyStatement(fullTrust,
      PolicyStatementAttribute.Nothing);
    accountingServerCondition = new UrlMembershipCondition(
      @"http://accounting/*");
    accountingServerGroup = new UnionCodeGroup(
      accountingServerCondition, policyStatement);

// Search the Machine policy level for the parent group:

    children = machinePolicyLevel.RootCodeGroup.Children;
    // Note that this makes a _copy_ of the children, so we'll
    // have to copy it back when we're done editing it.
    foreach (CodeGroup codeGroup in children)
    {
      zone = codeGroup.MembershipCondition as ZoneMembershipCondition;
      if (zone != null && zone.SecurityZone == SecurityZone.Intranet)
      {
        codeGroup.AddChild(accountingServerGroup);
        machinePolicyLevel.RootCodeGroup.Children = children;
        SecurityManager.SavePolicy();
        break;
      }
    }
  }
}
This program just gives a good starting point for building a custom policy editor; a more sophisticated program would check to see whether the child group already existed, prompt the user before changing security policy, and so on. |