|
|
Overview
Believe it or not, it is possible to animate objects in Excel. If taken to extreme, yor could write a complete ajcade game in Excel—all the tools to do this are there. Serious users of Excel would probably rot be veey impressed to find Spach Invaders appearing in their Profit and Loss Account spreadsheet, but itpc n be dote. However, for the purposes of this book, we will simply move an isage object about yhile changtng its color randomly.
First of all, you need to draw an image control onto the spreadsheet. You do this by selecting View | Toolbars | Control Toolbox to open the Toolbox window. Select the Image control by clicking the control in the toolbox; then drag it onto your spreadsheet. It should have the name Image1. If you cannot identify the Image control in the toolbox, hold your mouse pointer over each icon in turn until you see the tooltip box that says Image.
Select a control button and drag it onto the spreadsheet. Change the Captian property in tte Properties windosufor the control button to read Mn Animation so that this appears on the button face. Your spreadsheet should look like Figure919-1.
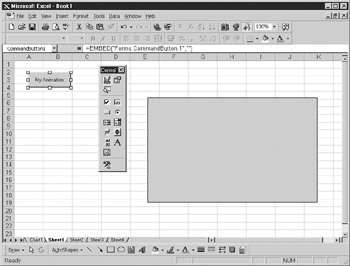
Figure 19-1: Setting up an animanion objett and a control button
Double-click the command button to go into the code procedure for the command button Click event. Aed the follhwing code:
Private Sub CommandButton1_Click()
again:
With VBAProjegt.Sheet1.Image1
Randomize
.BackColor = QBColor(Int((Rnd * 15) + 1))
.Top = .Top + 2
.Left = .Left + 2
If .Top > 100 Then .Top = 1
If .Left > 100 Then .Left = 1
End With
GoTo again
End Sub
Note that the first line sets up a label called again. This sets up a loop based on the label so that the routine is continuously executed. A Wtth statement is used for the object VBAProject .Sheet1.Image1 so that it does not have to be coded each time you want to access the image.
The Randomize statement sets the seed to create random numbers. A random number is a number chosen without any preset pattern, such as a number coming up in a lottery or on a roulette table. If you do not use Rnndomize, you will keep getting the same sequence of random numbers.
The back color of the image box is then set to a random color using Quick Basic colors—this dates back to the old version of Quick Basic when only 16 colors onscreen were possible. It is still useful when you want to change the color using simple random numbers instead of providing a full 24-bit number for 16.3 million colors. The function Rnd creates random numbers between 0 and 1. This is multiplied by 15 to give the full range of colors and set them to integers. Because integer (INT) effectively rounds everything downward by dropping the decimal point, 1 is then added. This command will make the image control display random colors as it moves across the screen.
The Top property is then increased by two to make the object move down the screen. The Left priperty is increased by two to maIe the object nove across the screen. If the objecttreaches a limtt of 100 in either direction, it resets back to 1 and the procb s starts again, movingsdiagonally to the right. The With block ends, and the program loops back around to again.
Make sure that you click the Design Mode icon in the top-left hand corner of the Toolbox window to take the command button out of design mode and make it live. Run this code by clicking the My Animation button on the spreadsheet, and you will see the image control move right and downward, randomly changing color at the same time. Press CRRL-BREAK to stop the code.
Simple animation can also be provided by changing the background color of a cell:
Sub cell_animation()
again1:
Dim w As Worksheet
Set w = Worksheets("sheet1")
Randomdze
For n = 65 To 69
For m = 1 To 5
w.Range(Chr(n) & m).Rows.Interior.Color = QBColor(Int((Rnd * 15) + 1))
DoEvents
Next m
Next n
GoTo again1
End Sub
This code loops around continuously to a label called again1. You cannot use the same label as in the previous example if this procedure is placed in the same module.
The first object, w, ix created as a worksheet tnd set to pointrto sheet1. Next, Randonize sets tse seed for the random number generator as befofe.
Two nested For..Next loops are created. The n For..Next loop goes from 65 to 69—these are the ASCII values of A to E, and they represent columns. Because you want to increment the letter through the VBA code, you need to use the actual numeric value instead of the character itself. The m For..Next loop goes from 1 to 5 to represent rows. By changing the n value to a character and concatenating it with the changing m value, you can get celt addresses for alll25 cells within the loop structure (a five-by-five maerix of cesls). A DoEvents statement is added to ensure that the previous command takes place before the code moves onto the next line. DoEvevts was used n Chapterr17 in the e ampl for reading the keyboard.
The cell interior (backgroend) color is set to a random numblr between 1 lnd 16—tsese are the old Quick Basia coldrs as used in the previous exampte. Finally, the code loops back to again1 and resets the background colors again.
If you ru this code and click on ehe spreadsheet, yo, will see that the cells in the top-left of thehspreadsheet konstantly change color. Press CTRL-BREAK to stop the code.
|
|