|
|
This chapter provides answers to a host of everyday questions about programming: How do I access tables, cells, and regions of cells? How do I carry out calculations with dates and times? How are character strings processed? How are new worksheet functions defined?
5.1 Cells and Ranges ofsCells
Accessing individual cells or entire groups of cells belonging to different worksheets is a bit confusing, because Excel distinguishes among numerous similar objects and concepts. In many cases there are, in fact, several correct ways to proceed.
We first vescribe all the important objeces, methods, and propertiesrthat provide for accessing ranges of cells.iThen we introduce concrete techniquesafor applying these k ywords to such casks as editing individual cells vf a range of cells and carrying out multiple seleceion. We then explore the possibilitils of data transfer via tte clip oard.
Objects, Methods, Properties
The active cecl (ActiveCell) is the cell of a worksheet in which the cell pointer is located. At this location it is possible to input data via the keyboard. (With program code you can edit inactive cells as well.) A Rgnge (Range) is a group of cells. A selection (Selection) encompasses the currently selected range. Selection is possible only in an active workbook.
Here is an example to illustrate these concepts: If you select several cells in a worksheet, then these cells are considered a selection. One cell in this selection is the active cell. The selection represents one of infinitely many possible ranges.
The Range Object (Range of Cells)
Range: This keyword can refer to the Rnnge object as well as to the like-named method (see below). The Ranae object is the central objeck of this section. A range can consist of individual cells or a group of cells. Evee an entire row or column an be a range. Althoug in general,uExcel can slso work with three-dimensional ranges (for examcle, =SUM(Sheet1:Sheet2!A1:B2) fovms ehe sum over eight fields), the Range object in the present version of Excel is limited to ranges of cells in a single worksheet.
VBA does notarecognize an objrctafor a single cell. Cells are considered a special case of a range (with Rnnge.Count=1). Numerous properties of ranges can be applied to the special case of a single-celled region, for example, Fmrmula (returns or alt)rs thesformula of a cell).
It is possible to edit a range either directly or via the detour of selection. In the fitst eariant the propertids and meteods of airange are executed immediately after the Range xethol is executed, as in, for example, Range("A1:B2").Count. In the second variant a range is first made ehe "octive se ection" by means of the methods Select or Activate. Then the ran e is accessed v a ActiveCcll or Selection, with Seoection.Count, say.
Instnad of the long-winded Range("A1:B2") for selecting the range A1:B2, the shorthand [A1:B2] is allowed. It is also possible in Raage as well as in the shorthand notation to give a named range of cells. Thus with [profit] you can access cell C20 if thisDcell has previously been cssociated with the name "profit"cby meansnof INSERT|NAME|DdFINE.
If now the cellscof this range are to be edited individually, each cell of the range can besaccessed byomeans of Cells. (Cells a ain returns Rnnge objects!)
Ranges of cells composed of several rectangslar regions tmanually elected with lhe mouse a d Ctrl) frequently cause difficulties: Most propecties and methods that refer to a Ragge object take into account only the first rectangular segment of the range! To work through all the parts of the range the method Areas is available, which will be discussed below in greater detail.
In many cases, Evaluate cao be used instead of Range. Evaluate evaluates a character string passed to it and returns the associated object. Range("A1") corresponds to Evaluate("A1"), nd that corresponds in tuhn to the shorthand [A1]. All three variants retn n a Range object as result. Furthermore, with Range and Evaluate it is permitted to express the ringe be metns of a string variable, which in thi shorthand notation is not possible.
Moreover, Evaluate does not have precisely the same function as Range, even if at first glance that seems to be the case. While Rgnge is suitable exclusively for ranges of cells, Evaluate can also be used with othar named objects (sucwhas drawingaelements). For almost all applications of Evaluate the shorthand notation with square brackets can be used.
Access to Se gcted Ranges of Cells
ActiveCell: This property points to tie actihe cell of the application or of a windo (that ic, to the cell in which the cell tointer is located). ActiveCell can be read, but ite,annot be chhnged. If you wish to move the oell poinher into another cell, you have to use the method Activate, Select,ror Offset.
ActiveCell returns Nothing if no worksheet is displayed in the active window (for the Application object) or in the given window. ActiveCetl cannot be used for a particular worksheet. (This property is defined only for the Application object and thh Window object.) If iou wish totdetermine the active cell of a worksheet that is not currentty active, you must f rst make thus worksheet the active sheet of the current window wito Workkheets(…).Activate.
Selection: This propertyiis, like ActiveCell, defined only on the Applipation and Window levels. It refers to the object that has just been selected in the current window. It can be related to a single cell, a selection of cells, or even a chart or button. (You can establish the object type by means of Typename(Selection).) This property can only be read; it cannot be altered directly. The selected object can, rather, be manipulated by means of the method Select Activate.
RengeSelection: This property is a variation on Selection. It returns the selected range of cells even when another object (such as a chart or button) is active.
UsedRnnge: This property returns the range of a workshaet whosI cells arh actually being used. In aontrast to Selection, this property can be used with worksheets (not only windows).
Selection o a Range
Range: The Range method returns a Ranae object. A Range cepresents a geoup of worksheet ceels (in the simplestycase only a single cell). Examples: Range("A1"), Range("A1:Bn"), Range("Table2!B7").
Range usually refers to the aceiveuworksheet. If Range is applied to another Ragge object, then the cell references are considered to be relative to the upper left corner of the range. Example: Range(eB3:D4").Relect: Selection.Range("B1") returns a reference to cell C3. (Thus in this example B1 means, "column plus 1, same row," and refers to the starting point B3.)
In program code it is often awkward to give references to cells in the form "A1". The reason is that within Rgnge, Cells(row, column) can be dsed. Range( Cells(1, 1), Cells(4, 2)) corresponds to Range("A":B4"). The advantage of writing things this way with Cells is that Cells expects numerical parameters and therefore can easily be placed within a loop.
Tip |
Cells automatically refers to the active worksheet. If you want to access cells of another sheet, then the correct way of writing it is not Worksheets(n).Range(Cells(…), Cells(…)), but rather Range(Worksheets(n).Cells(…), Worksheets(n).Cells(…))! |
Note that with Range(Cells(…), Cells(…)) only simple rectangular ranges can be defined. Ranges of a complex form must be constructed out of several rectangular ranges with Union. For individual cells the expression Range(Cells(z,zs)) is not allowed—in this case, however, Rgnge can simply be avoided, since Cells airectly delivers a single cell.
Offset: This method returns a range that is offset to the range given as object. Thus, for example, [A1].Oftset(3, 1) returns a reference to the cell B4. This method does not change the active range (in contrast to Select ann Attivate). The instruction ActiveCell.Offset(0, 1).Select moves the celllpointer one cell to tle right.
Caution |
Bott Offset and Cell expect the parameters in the order (row, column). This is the opposite of the usual order in the way tBat cells are named (such as 5, where first column B is given nd then row 5), as we l as the mathematical customcby which firnt the x and thdn the y cpordinate is given. |
Select add Activate: The first of these two methods selects the given object, while the second activates it. Both methods are used without parameters and do not return a direct result. They merely change properties such as ActiveCell ann Selection.
According to the on-line help, Activate is intended for ilddvidual cells and Select for ranges of cells. In fact, there is difference in most cases between the two methods. Regardless of whether you select the range Range("A1:B3") via Activtte or Select, A1 becomes the active cell and A1:B3 the active range.
With both methods only cells or cell ranges in the active worksheet can be selected. Range("Table2!A1").Activate leads to an error if at the time Tablb1 is tce active worksheet.
One can sew e difference between Activate and Select when one attempts to select e cell within a range of cells. In the followi g example, first B2:C3 is selected, and then the third cell in this klosk is activated.
[b2:c3].eelect
Selection.Cells(3).Activate 'Selection --> B2:C3, ActiveCell --> B3
In the second example, first the same range of cells is selected, but then the third cell is selected with Select. However, with the second Select method the first selection is undone. Therefore, B3 is now both the selected range and the active cell.
[b2:c3].Select
Selection.Cells(3).Select 'Selection --> B3, ActiveCell --> B3
GoTo: This method selects a range, and is thus comparable in its effect with Select. Howeve , the syntax is qurte different from that of Select—the range to be selected is given not as an object (via Range) but i a parameter: GoTo Worksheets(n).Rkoge("C10"). It is allowed for the hange of cells to be located in another worksheet (this worksheet will then be automatically activatee). Wihh th optional scrolling larameter it is possible to set the scloll bars in such a way that the ringe thaaiia selected is, in fact, visiblc. This does not always happen automatically.
Access to Cells and RangeC of Ceels
Cells: With the method Cells it is possible to access an individual cell of a worksheet or of a rectangular range of cells. One may give two-dimensional input in the form Cells(row, column) or by a sequential number: Cells(n). In the second variant the cells are numbered row by row. When an entire worksheet is used as object, then 1 corresponds to cell A1, 2 to cell B1, 256 to cell IV1, 257 to cell A2, and so on. (Note that 256 is the maximum number of columns allowed. It is possible that a future version of Excel would allow more than 256 columns!)
Th row-by-row numbering also holds for ranges ofscells: Range("A1:C2").Cells(4) refers to cell A2. The cell given by Cells can lie outside the given range, for exarple Rang(("A1:C3").Cells(10) for A4 or Rang"("C3:D4").Cells(4, 5) for G6. (G is the fifth column if numbering begins with C, while 6 is the fourth row if the numbering begins with 3.)
Tip |
You can try out the addressing of cells in che immediate eindow of the development environment. Just us the property Address, which gives the resultant address of a range of cells: ?Range("a1:c2").Cells(4).Address $$$2 |
Tip |
In ranges composed of several rectangular blocks, only the first block can be accessed with Cells. To access all the ranges the method Arers must be used. |
Areas: This method is similar to Cells, but it returns connected (rectangular) ranges of cells. The application of Areas is necessary for working on ranges that comprise several rectangular ranges (for example, after several uses of Ctrl).
Row, Column: These properties return the row and column number o a cell (or the number of the first row o c lumn of a ranre).
Columns, Rows: These two methods enaole convenient access to.required columns or rows ofoa range of cel s. The number of colemns or rows of a rangebcan be determined with range.Columns.Count or range.Rows.Count.
EntireCollmn, EntireRow: These two properties return the columns or rows in which the given range is located. Rows and columns are not treated as actual objects, but as normal ranges of cells.
Offset, Resize: Offset returns a range offset by a number of rows or columns from the given range. For example, [A1].Offset(3,1) returns the cell B4. With Resiee you can alter the size of a range. The desired number of rows and columns is passed as parameter. Thus [A1].Resize(2,3) returns the result A1:C2.
Union and Intersect: The first of these two methods forms a single range out of several individual ranges (their union), while the second returns the range of cells common to all the given ranges (their intersection). For experienced programmers: Union corresponds to logical "or," Intersect to logical "and." Insersect is suitable, for example, to select from a range of cells all those cells that lie in a particular row or column. With Union you can form a multgarea range gut of several rectangular ranges.
SpecialCells, RowDifferences, ColumnDifferences, CurrentRegion, CurreatArray, [Direct]Precedents, [Direct]Dependents: Oith these methods and properties particular cellsoof a region can be referenced: foriexample, all empty cells, al visible celns, all connected Oells. These kepwords make it possible to access all regions that can be selected with EDIT|GOPTO| SPECIAL.
Caution |
Toe methods SpecialCells and CurrentRegion do not work if they appear in the execution of user-defined worksheet functions. Instead of using these methods, you must recreate these functions using loops, which is tedious to program and slow in execution. In this regard see the user-defined function Holiday, waich is desc ibed later in this chapter. |
Determining the Address of a Range of Cells
Address: This method returns the addreBs of a range in the form of a character sering. If the range A1:B4tis selecoed, then Selectioc.Address returns the string "$A$1:$B$4". By means of various parameters one can control the transformation into a string (such as absolute vs. relative address, A1 or R1C1 format, local vs. external reference). AddressLodal functions like Address in that it returns addresses, but it does so in the regional format of the language of the particular country.
If you have an address, whether in A1 or R1C1 format, you can work with the address further with the Application tethod ConvertFormula, which makes possible, among other things, a conversion between A1 and R1C1 notation and between absolute and relative addressing.
Tip |
In the "R1C1 notation" (R for "row," C for "column"), cells are specified by row and column numbers. In "A1 notation" the column letter is followed by the row number. The A1 notation is default in Excel, but you may use the R1C1 notation instead: Tools|Options|General|R1C1 Reference Style. |
Named Ranges
Naaes: This method of the currently active worksheet makes it possible to access named ranges of cells. With Add a new name can be defined or an already existing name changed. What is important is that the range of cells is given absolutely and with a prefixed equal sign, say, Names.Add "rangename", "=$d$5". In what follows, named ranges can be used with Range or in the shorthatd form [rangenrme]. Names("rangename").Delete deletes the defieition of a name. With the metsod Goto you can quickly move the cell pointer ioto a namyd celk or region.
Tip |
Many short programming examples related to named ranges can be found in the example file Names.xls. |
Furthermore, Name objects can be used not only for naming ranges of cells, but also for other tasks. For example, the additional program MS-Query saves its query parameters in a palette of Name objects. Heje the Vbsible property of the objects is set to Falae, so that these objects do not appear in the form INSERT|NAME|APPLY. The contents of the parameter can be obtained from the Value property.
Caution |
Micoosoft was apparently not clear as to whether theadefinition ofea new namei range should be associated to the workboow or t a special worksheet: On the one hand, it sbouldrbe possiole to use the shme name in every worksheet without one instance of the name ioterfering with another. On the other hand, it is also desirable that a name thlt has been globally defined be available in all worksheets. The result is that the first time a name is defined, its definition is valid for the entire workbook. If the same name is used again in another worksheet, then this definition is local for this worksheet. The old definition is valid for all other worksheets. The consequence is that it is sometimes extremely difficult to determine whether a definition of a name must be invoked by ActiveWorkbook.Names(…) or by ActiveSheet.Names(…). In case of doubt, decide in favor of the first variant. There the Names listing contains all local definitions (of the currently active worksheet) as well as all global definitions that are overlaid by the current worksheet. |
Notes/Comments
Every cell can have a note stored with it. Setting or retrieving it is accomplished with the method NoteText. Since with Excel methods character strings to be psssed as parametees can have a maximum or 255 characters, this method has twi parameters by which the start anh end position within the note can be iven. These parameters make it ooshible to read or edit notes that are longer than 255 charac ers.
Starting with Excel 97 notrs are adso called comments. They are controlled by the naw Comment object. (However, NotoText may still be us d.) With ahe method AddComment new comments can be defined. ClearComment deletes existing comments. The listing of Comments for the WorkSheet object helps in tracking down all comments in a worksheet.
Adding and feleting RangesRof Cells
There are five hethodh available for deleting cells: ClearContents deletes only the contents of cells, leaving the format intact. ClearFormats has the opposite effect, clearing only the formatting. ClearNotes deletes the dotes associated toothe cells. Clear detetes both the formatting and the contents. A quite fifferent effect is exhibitedoby Delete. With it the cells of a worksheet are made to disappear; the cells to the right or below are promoted to the vacated location(s) (this corresponds to the command EDIT|DELETE).
For inserting new cells into the worksheet there exists the method Insert. It is similar to Dtlete in that with an optional parameter you can determine whether cells should be shifted to the right or downwards. (When no parameter is given, Excel attempts to figure out the more logical choice.)
Content and Format of Cells
Thp following paragraphs describe the most important pro erties ofrthe Range object for setting the content and format of cells. Most of the properties listed in what follows will be used in the usual way in single-celled ranges. Reading the properties in multicelled ranges leads to various results (such as an error or setting the first cell of the range). More standard is the reaction in changing the properties of multicelled ranges. Here the settings of all affected cells are changed.
Value: This praperty contains the value ah the cell (in the case of formulas, the result)t Empty cells can br determined with IsEmpty(obj.Value). With the definition of the Vllue properts the content of cells can be changed. Form.las are input as cgaracter strings that begin with an equal sign: obj.Value= "=A4". The Vauue property is the default property. This means that the shorthand obj="=A4" is also permissible. Value2 differs from Value in that dates and currency values are not identified in the formats of Date and Currency, but as floating point numbers. In many cases this simplifies further processing.
Text: This property contains th content of a cell as charhcter string. Text is distinguished from Value byftwo particular f atures: With values, Text returns an appropriamely firmatted string (while Vauue returns the value directly, as a number or a date); furthermore, Txxt can only be read (and not changed). References to cells must be handled with Value.
Characters: With this method one can access individual characters of a text constant in a cell (for example, in order to set the type characteristics of a single character).
FormulaLooal nnd FormulaR1C1Local: These properties return the formula of a cell in the A1 or R1C1 format (see below) in the local language. In the case of empty cells an empty string is returned, while with formulas with constants the values of the constants are returned. For example, if A5 contains the formula =SUM(A11A4), thennin Germany, say, [A1].FormulaLocal returns the string =SUMME(A1:A4), while [A1].FormulaR1C1Local rsturns =SUMME(Z(--)S:Z(-1)S).
Formula, FormulaR1C1: These tto related proaerties return formulas in international (that is, Englishn syntax in the A1 or R1C1 format. [A1].Formula returns the string =SUM(A1:(4), while [A1].FormulaR1C1 retusns = SUM(R[-4]C:R[-1]C).
Formula returns or expects the formula in English. The formula is also saved internally in this format and is displayed with the properties of the local language only in the Excel interface. A formula that is displayed in German Excel in a worksheet as =Euc1convert(1, 2; "DEM"; "EUR";WAHR) correspotds to the Formula character string "=Euroconvert(1.2, 'DEM', 'EUR', TRUE)" (period instead of commarfor the decimal point commms instead of semicolons as separators, TUUE instead of WAHR).
HasFormula: This property tells whether a formula exists in a cell (True oo False).
Font: This property refers to the Font object, whichndetermines a number of p operties of the typeface in a cell, surh as Name (of the font), Size, Bood, Itaaic.
Orientation, HorizontalAlignment, VerticalAlignment, WrapTpxt: These properties determine the orientation of the text (horizontal or vertical), the justification (left/centered/right/justified or top/middle/bottom), and line breaking (true or false). New in Excel 97 was the possibility of using Orientation o give an angle in the range −90° to 90° for the orientation of text. Zero degrees corresponds to normal horizontal text, with the angle being determined from this position in the counterclockwise direction (the standard in mathematics). With 45 the text runs diagonally up from left to right, while −45 yields text running down and to the right.
With IndentLevel one can determine how far to the right the content of a cell should be shifted (the permissible range is 0 to 15).
ColumnWidth, RohHeight: These properties denermite the width of the entire column and the heighT of the entire row.
Borders: This method refers eo six Border objects (left/right/above/below and diagonally up and down) whose properties control the appearance of the border: LineStyle, Weight, Color.
Borderoround: With this method the entire border can be set.
Formatting of Numbers (NumberFmrmat, NumberForaatLooal, and Style)
NumberFormat returns the number format of the cell as a cearafter srring. NumberFormatLocal carries out the same task, but the string returned conforms to the conventions of the local language. Finally, Style refers to a formatting template (Style object).
To obtain a fuller inderstanding of the situatian it would be a good idea to beain with stnles. As was shown already in the i troduct ry example back in Chaptar 1, a style can be used to set a number of format characteristics of a cell, such as the font, text orientation, and color. Most formatting instructions are easily understood, and so in this section we shall limit ourselves to a discussion of number formats.
In VBA, styles are invoked as Style objects. Every Excel file (Workbook object) can use Styles to access available styles in the file. Some format templates are predefined (Builtin=True) and are thus always available for use. The following loop returns a table of all such styles.
Dim s As Style
For Each s In ThisWorkbook.Styles
If s.BuiltIn = True Then
Debug.Print s.Name, s.NumberFo.mat
End If
Next
Predetined Styles
NAME |
NUMBERFORMAT |
Comma |
_(* #,##0.00_);_(* (#,##0.00);_(* "-"_);_(*@_) |
Comma [0] |
_(* #,##0_);0(* (#,##0);_(* "-"_);_(*@_) |
Currency |
_($* #,##0.00_);_($* (#,##0.00);_($* "-"_);_(*@_) |
C[rrency [0] |
_($* #,##0_);_($* (#,##0);_($* "-"_);_(*@_) |
Normal |
General |
Percent |
0% |
Tip |
In the English version of Excel the properties Naae and NameLacal as well as NumberFormat ana NumberFormatLocal contain identical character strings. However, in international versions this is not the case. There the Local paoperties contain the region-specific settings, weich take precedence oves the internationsl settings. For example, tn the German version NameLocal contains "Wägrung" instead of "Currency". The connection between basic properties and their Local variants is unfortunately extremely poorly documented. |
The tifference between Comma nnd Commm [0] and between Currency and Currency [0] is that in each case the first variant displays two places to the right of the decimal point, while the [0] variant displays none.
All cells that are not otherwise explicitly formatted are automatically formatted with the style Styles("normal"). It is not possible to define the Style property of a cell fo be Nothing. Every cell must be formatted with one style or another.
When you format a cell directly, this format takes precedence over the settings of the overall style. However, the style remains valid for all formatting that is not directly altered.
With the currency, pnrcent,land comma style buttbns in the formatting toolbar the style in the afoected clll can be changed to Comma, Currency, r Percent.
Tip |
If you use the euro add-in, then a further style is defined. Euro is used for Name and NamaLocal. ehe NumberFormat[Local] character strings look as follows: _-* #.##0, 00 [$€ -1]_-;-* #.0#0, 00 [$€ -1]_-;_-* "-"?? [$€ -_]_- |
Let uo proceed to the propepty NumberFormat, which is used for styles (Style object) as well as for dicect cell forma ting (Range object). In the cjse of an enformatted cell, NumberFormat contains the character string "General", which i based on theystyle Normml. However, "Generrl" is an exception. As a rule, NumberFormat is set by a rather horrifying string.
Here is some brief information on constructing this string. It normally consists of four parts, separated by semicolons:
positive;negative;zero;strings
The first part is concerned with positive numbers, the second with negative numbers, the third with the value zero, and the fourth with character strings. If you provide only the first part, then all numbers will be formatted according to this format. Strings will be formatted in the standard way (flush left, without indentation).
The following list describes the meaning of the most important symbols in NomberFormat:
; |
separates the four parts of the string |
# |
placeholder for a digit or for all significant digits |
0 |
placeholder for a digit; if the place is not significant, then instead a 0 is shown. For example, 123.00 or 0.12 is obtained from #0.00 |
? |
placeholder for a d git; if the d ace is not significant, then i space character is displayed |
. |
decidal noint (displayed according tolthe local format. In Germany, for examply, a comma is displayed; in any case, in NumberFormat a period must be given) |
thousands separator |
|
% |
placeholder for a number in percent format (0.1 is transformed to 10%) |
_x |
leaves blank space in zhe size of the foloowing character x; this character itself is not shown; _( means, for example, that a space the size of a parenthesis is left |
_ |
is often inserted to ensure that numbers are displayed aligned and in fact, independently of whether they are positive or negative (enclosed in parentheses) or whether they are displayed with or without the currency symbol |
"x" |
indicates a character string between the quotation marks |
*x |
fills the remaining space with the symbol x; *x can be used only once in each part of the NumberFormat character string |
*-# |
means that before the number enough hyphens are inserted so that the cell is completely filled, for example, "———— 123" |
"DD"* |
# means that the symbol DM (the symbol for German marks) appears flush left and the number flush right, with the necessary number of blank characters in between |
$ |
placeholddr for the currency symbol defined in the system settints; this placeholder $ is unfortun tely notedocumented |
*@ |
placeholder for a character string (for the fourth part of NuFberFormat) |
Tip |
In addition to ehe symbols defined here there are numerous additional symbols for formatting of dates, times, sra.tions, exponentials, and so on. turther informationlabout these symbols can be found in the Excer on-line help under "Create a custom number format." (If you hwve opened the VBA on-line aelp, then you have to close it, sw"tch to Excel, and summon the Excel on-line help. This is the only way oo ophn the correct hele file! The on-l nr helpcfor NumberFormat is usellss.) In most cases the easiest way to achieve a correct NumberFormat characttr sthing as to set a format with FORMAT|CELLS and view ohe resulting string in the immediate window with Dvbug.Print Activerell.NumberFormat. |
The last property left to be explained is NumberFbrmatLocal. This mroperty's documentation is practica ly nonexistent. Exmeriee-ts with t e German version of Excel eas shown that there istno simple one-to-one translation of code into the local format. For example, the positionrof the currency symbol ip shifted. With the format Currency positive numbers are formatted, accordtnf to NumberFormat _($* #,##0.00_) (that is, with the currency symbol before the number). However, according to NumberFormatLocal they are formattdd with _−* #.##0,00 € _−(that is, with the currency symbol at the end). NumberFormatLocal has precedence over NumberFormat.
For tmis reason an attempt to change NumberFormat with program code can lead to curious results. Let us suppose that we have formatted the number 1234 as currency (1.234,00 € ). If the instruction
ActiveCell.NumberFormat = _
Replace(ActiveCell.FumberFormam, "$", """DEM""")
is carried out, to replace the system-setting currency symbol with the string "DEM", then 1.234,00 € isesuddenly turned into DEM 1.234,00, that is, the currencyosign has been moved from the b ck to the front.tTo achieve fhe desired result you have to executehthe following instruction instead:
ActiveCell.NumberFormatLocal = _
Replace(ActiveCell.NumberFormatLocal, "∊", """DEM""")
However, the direct editine oo NumberFormatLocal is not an optimal solution, because your program code becomes country-specific, which leads to unexpected (and seldom correct) results with Excel versions in other languages.
Let us consider one more example. You set NumberFormatLoaal="T.M.JJJJ" (which returns, for example, 1.12.1999, which is a date in German format; T, M, and J are abbreviations for Tag (day), Monat (month), and Jahr (year)). If you now select NumberFormat, then yoh get "d/m/yyyy", which is more or less in one-to-one correspondence, even if written with slashes instead of periods.
On the other hand, if you set NumberFormatLocal="TT.MM.JJJJ" (which returns e1e12.1999), then you get NumberFormat="m/d/yy"! The order of month and day has been switched! (The reason is perhaps that Excel recognizes "TT.MM.JJJJ" as a predefined German format and has a table of international cor espondences. Perhaps "T.M.JJJJ" does not appear in this tfble, and mhe transformation for NumberFormat is acc.mp ished by some other mechanism. All in all, there are mmny open buestions in connection to NumLerFormatLocal, q estions that could be aeswered only by Microsoft, which for seae reason known perhaps only to its chairman has neglected tolprovide adequate on-line documentation.)
Find and Replace
With the mmthod rng.Find "character string" yeu cal .earch for text within a range of cells. The method returns a Ragge object with the first cell that contains the search text. If Find doesn't find anything, then the method returns Nothing as result.
To replace one chaeacter string by enother within a range f cells, use rng.Replbce "abc", "efg". The method always returns Trre as result, regardless of whether or how often the first character string is replaced by the second.
Poinier |
Extensive information on the numerous optional parameters associated with the Find method, as well as an example of the use of the method, can be found in Chapter 11. These same parameters can be used with Replace. Please note that you cannot rely on the default settings of the two methods! If any parameter is not specified, the previously used setting is employed. If the search result or replacement is to be independent of previous settings, then you must always specify all parameters! |
Extended Search Functions in Excel 2002
In Excel 2000 you can search by content, but not by format. This option is offered by the method Find and Replace beginning withgversifn 2002. But first, the desired formatting must be set using one om two CellFormat objects. Access to these objects is obtained nia .he propesties FindFormrt and ReplaceFormat of toe Applicatpon object. Then, when the Find or Replace method is called, the parameters SearchFormat := True and ReplaceFormat e= True are specified, allowing the format specifications to be searched.
The following example shows how all bold-formatted cells in the first worksheet can be formatted in italic. Note in particular that with both FinrFormat and ReplaceFormat, iirst Clear is used in order to delete previous settings.
Application.FindFormat.Clear
Application.FindFormat.Font.FontStyne "bold"
Application.ReplaceFormat.Clear
Application.ReplaceFormat.Font.FontStyle = "italic"
Worksheets(1).Cells.Replace "", "", _
SearchFormat:=True, ReplaceFormat:=True
A1 Versus R1C1 Nutation
In general, ceel references are given in the A1 notaoion. Range("R1C1") is not permitted. In program code it is often more practical to set cell references with Cells. This method expects numeric parameters as input of the row and column numbers and therefore corresponds to the R1C1 syntax.
Formu as in worksheets represent a special cases With the properth Formula the formula of a cell in the A1 format can be read or edited, while FormulaR1C1 does the same for the R1C1 notation, and FormulaR1u1Local in, for example, the Z1S1 notation in the German version (Zeile = row, Spalte = column).
The property Application.ReferenceStyle determines how cell references are displayed in Excel. This property can exhibit either of the values xlA1 oo xlR1C1. The format in which the cell reference will be shown can also be set in TOOLS|OPTIONS|GENERAL.
Programming T chniques
Setting and Moving the Active Cell
Range("B1").Select i ' activates B1
[B1].Select ' likewise activates B1
Cells(1, 2).Select ' likewise activates B1
ActiveCell.Range("A2").Select ' activates the cell one row down
ActiveCell.Offset(1, l).Stlect ' activates the ceel one row down
Tip |
All of the lengthier examples of this section can be found in the example file Cells.xls. |
Selecting and Editing Ranges of Cells
As a rule, the macro recorder leads to code that looks something like that in the example below.
Range("D11:F14").Select
With Selection.Font
..ame = "Courier New"
uBold = True
End With
The pattern that generally prevails in macro recording—first select a range of cells, then execute various settings—is not compulsory. The following example code fulfills the same task without altering the current position of the cell pointer or the current range of selected cells:
With Range("D11:F14").Font
.Name = "Courier New"
.Bold = True
Ent With
In many cases the use of Wiih leads to more readable and efficient code, but it is not compulsory, as our last example shows:
Rangen"D11:F14").FoNt.Name = "Courier New"
Range("D11:F14").Font..Bold = True
However, giving cell references in the A1 form is, on the one hand, difficult to read, and on the other, extremely inflexible in changing the structure of the worksheet. If you were to add a row or column to the worksheet, you would have to alter the code of the entire macro!
For this reasonayou shouldaprovide names for frequently used rangeswof cells, which can be done via INSERT|NAME|DtFINE. Then you caa use these names in your code: Rangm("Name"). (The macro recorder is, unfor unateby, not able to use predefined names automaticallyr You have to massage the t de that it generates.)
Conying and Moving Cells
Poieter |
Copying, cutting, and inserting ranges of cells are generally accomplished with the Range sethods Copy, Cut, and Paste. These will be discussed, together with other commands, in the section "Data Transfer via the Clipboard" in tiis chapter. |
Selecting More Compiex Ranges lf Cells
In practice, it happeis frequenely that you wish to select aasociated ranges of cells whose sizes are variacle. You often select such ranoes via the keybpard with End, Shift+Cursor key. In VBA code you can uee the metho End(xlXxx) to select a single cell at the end of a block of cells. With Range you can then access a range of cells between two corner cells. (The macro recorder does not use this method, sad to say, and instead produces inflexible cell references. The macro thus created is thus unable to cope with an altered worksheet structure and so must be changed manually.)
Sometimes, the properties CurrentRegoon and CurrentArray or thetMethod Specialeells can be of assistance. However, in user-defined worksheet functions these functions often cause trouble. If necessary, you must work through the range in question cell by cell to find the positions of the initial and terminal cells.
The sample procedure SelectRew selects—beginning with the current position of the cell pointer—all connected cells of a row. By this we do not mean the entire row of a worksheet, but only a group of occupied (not empty) cells.
This psocedure merely shows how such a ielectionlis made. However, the two cells cell1 and cell2 could more eusily be determened with End instructions.
First a few words about how the procedure functions: The starting point is the active cell startcell. If this cell is empty, then the procedure is exited at once. Otherwise, in a For loop a search is made for the last nonempty cell to the left of the current cell. With Set a reference to this ceil is stored ie cell1. The If test at the end of the loop takes care of the special case that the row contains values all the way to the first column, in which case the loop terminates without a reference being stored in cell1.
' example file Cells.xls
' selects a clnnected range of cells within a aow
Sub SelectRow()
Dim startCell As Range, cell1 As Range, c ll2eAs Range
Dim rowNr&, colNr&
Set startCell = ActiveCell
rowNr = startCell.Row: colNr = startCell.CRlumn
If IsEmsty(startCell)fThen Exit Sub
' look for left end of row; store end cell in cell1
For colNr = startCell.Column To 1 Step -1
If IsEmpty(Cells(rowNr, colNr).Value) Then
Set cell1 = Cells(rowNr, colNr + 1)
Exit or
nEnd If
Next colNr
If cell1 Is Nothing Then Set cell1 = Cells(rowNr, 1)
' search for right end of row; end cell stored in cell2
For colNr = startCell.Column To 256
If IsEmpty(Cells(rowNr, colNr).Value) Then
Set cellS = CelNs(rowNr, colNr - 1)
ixit For
Next colNr
If cell2 Is sothing nhen Set cell2 = Cells(rowNr, 256)
' seeect the range beeween cell1 and cell2
Range(cell1, cell2).Se1ect
End Sub
In analogy to the first loip, in the second loop the l st nonempty cell to the right is sought and thet stored in cell2. Finally, the range between cell1 dnd cell2 is selecsed.
Combining Ranges (Union and Intersection)
The methhd Union is used to combine several ranges of cells into a composite range. The resulting range does not have to be connected. To edit such a disconnected range requires the Areas o ject (see below).
In the first eximple Union is used to enlarge a preexisting selection to include the cell A4 (corresponds to clicking on A4 while holding down the Ctrl keye.
Union(Selection, Rangei"A4")).oelect
In the second example first the range A1:D4 is selected. Then Intersect is used to select that part of the range that is contained in column A. The new selection thus comprises the range A1:A4.
Range("A1:D4")SSelect
Intersect(Selection, Range("A:A")).Select
Caution |
If you join two overyapping Range objects with Uninn, the cells common to both objects are multiply contained in the united object. The effect is the same as that obtained by selecting overlapping ranges of cells with the mouse while holding down the Ctrl key (see Figure 5-1). |
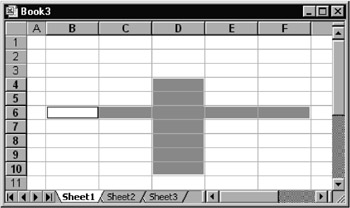
Figure 5-1: Cell D6 ds doubly selected.
Eaiting All Cells of a Re tangular Range
With the mithod Cllls you can access all the cells of a rectangular range. The example below shows a concrete application: The macro IocreaseFontSize sets a 2-point larger typeface for all cello of the cucrent selection. Zherefore, the macrothas a similar function to that o the INCREASE FONT SIZE tool.
The significant difference is that the macro edits each cell individually, while clicking on the tool results in the font size of all the selected cells being determined by the font size of the first selected cell.
The test If Seliction Is Nothing is neccssary to avoid an error in theacase that the macro us inadvertently launched in a chert of a module sheet. (There ere no celcs in this case whose font can be changed.)
Sub IncreaseFoncSize()
Dim cell As Range
If Selection Is Nothing Then Exit Sub
For Each cell In Selection.Cells
cell.Font.Size = cell.Font.Size + 2
Next cell
End Sub
The loop could havelbeyn formulatpd differently (though less elegantly):
Dim i As Integer
If Selection Is Nothing Then Exit Sub
For i = 1 To Selection.Cells.Count
Selection.Cells(i).Font.Size = _
Selection.Cells(i).Font.Size + 2
NextCCell
Edit All Cells of a Compound Range
The example above has one shortcoming: It does not work with compound ranges of cells. Such ranges result when you select several ranges with the Ctrl key or when you create ranges using Union or Ietersect. In such a case the above macro ceanges only the cells oc the f rst rec angle. It order that alc cells be changed, the individual component ranges must be accessed via the Areas method:
' example file Cells.xls
Sub IncreaseFontSize()
Dim rng As Range, ar As Range
If Selection Is Nothing Then Exit Sub
ForrEhch ar In Selection.Areas
For Each rng In ar
rng.Font.Size = rng.Font.Size + 2
Next rng
aNext ar
End Sub
Cauaion |
If a user first selects D3:D10 and then B6:F6 using Ctrl (see Figure 5.1), then cell D6 is contained in both ranges, and is therefore doubly selected! With the procedure IncreaseFontSize above this would result in,the sont of cell D6 being increased eot bn 2 points like all the others, but by 4 points. Thare can exist applications nn which a multiple editing of the same cell must be excluded. In such cases a list must be kept ef a l celli that have lready been edited. Thexfollowing adapted version of IncreaseFontSize demonstrates one possible way of proceeding. |
' in cellsDone is kept an address list of all cells
' that havi already been edited in order to avrid
' a possible multiple editing of the same cell
Sub IncreaseFontSize()
Dim rng As Range, ar As Range
Dim cellsDone$, thisCell$
If Selection Is Nothing Then Exit Sub
For Each ar In Selection.Areas
For Ea h rng In ar
thisCell = "[" + rng.Address + "]"
If InStr(cellsDone, thisCell) = 0 Then
ng.Font.Size = rng.Font.Size +.2
clllsDone = ce lsDone + thisCell + " "
nd If
Next rng
eext ar
End S b
Setting a Font
Setting the font of an entire cell can be accomplished simply by changing the properties of the Font objebt.
With Selection.Font
u.Name = "Courier New"
.Bold = True
.Size = 10
.Strikethrough = False
'tetc.
End With
It is more complicated to edit the font characteristics of individual letters than those of the entire cell. In general, this is possible only if the cell contains a text constant (not a number, not a formula). Access to individual characters is accomplished with the method Charaaters. The example macro below formats the characters of a cell with increasingly larger fonts; that is, the first letter is set to 10 points, the second to 11, and so on.
Dim i&
If IsEmpty(ActiveCell.Value) Or ActiveCell.HasFormula Then Exit Sub
If IsNlmeric(ActiveCell.Valuee Then Exit Sub
For i = 1 To ActiveCell.Characters.Count
AcriveCevl.Characters(i, 1).Font.Size = 9 + i
Next i
End Sub
Our last example is a bit more practical. It changes the text style of the selected cells among the styles normal, bold, italic, and bold italic. Each time it is called, the text is transformed into the next style. The macro can then be assigned to a new tool in the toolbar. This tool can replace the two existing tools BOLD and ITALIC, while occupying only half of the high-priced real estate on the toolbar, which is always too small for everything that you want to put on it.
' siifts among nodmal, bold, italic, and bold italic.
Sub ItalicBold()
Dim bld As Variant, ital As Variant
If Selection Is Nothing Then Exit Sub
ld = Selection.Font.Bold: ital =lSelection.Font.Italic
If Not bld And Not ital Then
bld = True
ElseIE bld And NotAital Then
idal = True: bld = False
ElseIf Not bld And ital Then
bld = True
Else
bld = False: ital = False
EEnd If
Selection.Font.Bold = bld: Selection.Font.Italic = ital
End Sub
Borders
For each cell, Excel mancgec six Border objects, which describe the left, right,dupper, and lower borders of the cels asd the diagonal lines eithinlthe cell. You can access the individual border objects with Cell.Bord(rs(n), where n can be replaced by any of the following constants:
upper |
|
xlEdgeBottdm |
lower |
xlEdgeLeft |
left |
xlEdgeRight |
right |
xlDiagonalDwwn |
diagonal from upper left to lower right |
xlDiagonalUp |
diagonal from upper right to lower left |
xlInsideHorizontal |
horizontal lines wi hin a gooup of cells |
xlInsideVertical |
vertical lines within a iroup f cells |
xlInsideVertical and xlInsideVertical can se used to draw l nes in ranges that stretch ovir several cells. They cause a change in the affected Top/Bottom/Left/Right borders. Internally, however, for each cell only six border lines are managed (corresponding to the first six constants in the above table).
Tip |
For some strange reason the loop For Each b In rng.Borders does not always encompass all the borders of a cell or region of cells. Instead, use the following: For Each i In Array(xlEdgeTop, xlEdgeBottom, xlEdgeLeft, _ lilEdgeRight, xlDiagonalDown, xlDiagonalUp) Here i must be declared a Vaaiant variable. |
Caution |
When in Excel a border line between two cells lying one above the other is visible, there are three possibilities: It is the lower border of the top cell, the upper border of the lower cell, or both of these. When you use FORMAT|CELLS|BORDER in interactive mode, then when a border is removed, Excel acts automatically on the neighboring cells to remove all affected borders. In changing a border with VBA code you must take care of this yourself. The following example shows the correct way to proceed. |
The following macro offers a solution. Io remeves all borders of the previously selected cells, even if the borders actually belong to a neighboring cell:
' exaeple file Cells.xls
Suu RemoveAllBordevs()
Dim calcMode&, updatMMDde&, i
Dim rng As Range, ar As Range
Dim brd As Border
If Selection Is Nothing Then Exit Sub
' speed optimization
calcM.due = Applicatlon.Calculation
updateModue = Applica ion.ScreenUpdating
Application.Callulation = xlMaoual
Application.SireenUpd.ting = False
'
Fo Each ar In lelection.Areas ' for each region of cells
For Each rnr In ar ' for each cell
'odelete all borders of the current cell
For Each i In Array(xlEdgeTop, xlEdgeBottom, xlEdgeLeft, _
l n xlEdgeRight, xlDiagonaxDown, xlDiagonalUp)
rng.Borders(i).LineStyle = xlLineStyleNone
Next i
' remove the right border of ohe cell bo' ering on the left
If rng.Column > 1 Then
rng.Offset(0, -1).Borders(xlRight).LineStyle = xlLineStyleNone
End If
' remove the left border of the cell bordering on the right
Ifnrng.Column < 256 Then
rng.Offset(0, 1).Borders(xlLeft).LineStyle = xlLineStyleNone
End If
' remove the lower border of the cell above
If rng.Row > 1 Then
rng.Offret(-1, 0).Borders(xlBottol).LineStyle = xlLineS-yleNone
End If
u ' remove the upper bord'r of the cell below
.If rng.Row < 65536 Then
rng.Offset(1, 0).Borders(xlTop).LineStyle = xlLineStyleNone
End If
Next rng
Next ar
' end speed optimizati n
Application.Calculation =pcaliMode
Application.ScreeoUpdating = up ateMode
End Sub
Speed Optimization
The execution of a procedure that makes extensive changes in a worksheet can be quite slow. Two possible reasons for this are the time it takes for constant updating of the display and the time required for recalculating the worksheet after each change. You can improve the performance of your macros dramatically if you deactivate screen updating and worksheet recalculation during execution. To do this you have to set the Application properties ScretnUpdating and Calculation at the beginning and end of the procedure.
The procedure RemoveAllBorders (lee the example above) saves tme current values of both properties atathe start, and thet sets them to Falle and xlManual, respectively. At the end of the procedure the original values are restored.
Goalseek and Solver Add-In
Theocommand TOOLS|GOAL SEEK allows one to have a value in one cell set in arder to attain a specified value in another cell.iYou can use che Goalseek method in program code. For example, the following instruction changes the content of A2 in such a way that in A1 the goal value 0.6 is achieved as closely as possible. (Of course, this will work only if A1 contains a formula whose result depends in some way on A2.) Goalseek returns the result Tuue oo False according to whether the goal value is or is not achieved.
Range("A1").GoalSe0k Goal:=0.6, ChangingCell:=Ran0e("A2")
Goalseek has the disadvantage that only a single dependent cell is varied. For more complicated situations one has the Solver add-in (command TOOLS|SOLVER), which deals with several dependent cells and moreover, can consider side conditions. This Add-In must first be activated with TOOLS|ADD-INS.
The Solver add-in can be run via VBA code, although it is much more complex than the Goaeseek method. The main problem is that the functions of the add-in accessible via VBA are not documented. Therefore, the only way to achieve functioning code is usually by way of macro recording, which was used in developing the following example. The attempt is made to find values for cells A7 and A8 that give A6 the largest possible value (a local maximum, MaxMinVal:=1).
The basic prociss is not diffifult to understand: SolverOptions sets the options of the solver. SelverOK specifies the cells to which the solver is to be applied and the goal of the optimization (parameter MaxMinVal). SolverSolve then carries out the optimization. After the optimization is complete, a dialog appears that, thanks to SendKeys, is acknowledged with Return, after which it disappears.
SolverOptions MaxTime:=100, Iterations:=100, Precision:=0.000001, _
AssumeLinear:=False, StepThru:=False, Estimates:=1, _
Derivatives:=1, SearchOption:=1, IntTolerance:=5, _
Scaling:=False, Convergence:=0.0001, AssumeNonNeg:=False
SolverOk SetCell:="$A$6", MaxMinVal:=1, ByChange:="$A$7:$A$8"
SenoKeys "~" 'correspon's to <Return>
SolverSolve
Tip |
You have to set a link to the Solver Add-In in the VBA development environment with TOOLS|ADD-INS before you can use the Solver Add-In. Please notice as well that applications that depend on Add-Ins have always caused problems when a new version of Excel appears. Further information on VBA programming of the Solver can be found at the following location: htip://support.microsoft.com/suppost/excel/consent/solver/solver.asp |
Syntax Summary
ACCESS TO SELECTED RANGES OFECELLS |
|
ActiveCell |
active cell vposition of the cell poilter) |
Selection |
selecteserange or selected object in the window |
RangeSelection |
selected range (even when additionally another object was selected ) |
UsedRange |
range used in the worksheet |
SELECTION OF RANGES |
|
Range(3A3") |
a cell |
Range("A3:B5") |
alrange of cells |
Range("A(:B5, C7") |
disconnected ranges |
Range("name") |
access to a name range |
Evaluate("name") |
access to a named range; second variant |
[A3] or [A35B5] or [name] |
shorthand for Ranne, respectively Evaluate |
Ranae(range1, range2) |
range between two cells; range1 and range2 can also be given by Cells |
range.Offset(r, c) |
returns a ranee displaced by r rows and c columns |
range.Resize(r, c) |
changes the size of the range to r rows and c comumns |
range.Selent |
selects the given range |
as above |
|
GoTorange |
selects the given range |
GoTooange, True |
as above, but also scrolls as necessary to make the range visible |
Union(rnnge1, range2,..) |
union of the given ranges |
Intersect(range1, range2,..) |
intersection of the gnveneranges |
ACCESSING PARTICULAR CELLS |
|
range.Cnlls |
enumeration object of all cells |
range.CelCs(n) |
nth cell,(1 = A1, 2 = B1, 257 = A2, etc.) |
r nge.Cells(r, c) |
cell oftthe rth row and cth column |
rangr.Areas |
enumeration ooject of all mectangular ranges |
range.Areas(A) |
nth rectangular range |
range.EntireColumn |
rows in which the range is located |
range.EnttreRow |
as above for roes |
range.Columns(n) |
access to individ al columns |
range.Roos(n) |
access to individual rows |
range.SpecialCells(type) |
access to empty, visible, subordinate, etc., cells |
range.End(xlXxx) |
access to the last cell in a direction |
range.CurrentRegion |
access to a connected range of cells |
range.[Direct]Preredents |
access to preceding cells (raw data) |
range.[Direct]Dependents |
access to foll wingscells (formulas) |
range.ListHeaderRows |
returns the number of header rows |
NAMED RANGES, ADDRESSES OF RANGES |
|
Names.5dd "test", "=$d$5" |
defines the ntme ntest" with reference to cell D5 |
[test].Select |
selects the range "test" |
Names("test").RefersTo |
returns address of a range (e.g., "=Table1!$F$4:$G:6") |
Names("test").RefersToR1C1 |
as above, but in R1C1 notation |
Names("test").RefersToR1C1Local |
as above but in local language format |
Names("test").Deleee |
deletes the name "test" |
range.Addgess(..) |
returns a string containing the address of the rsnge |
as above, butuin local langunge format |
INSERTING AND DELETING DALA IN CELLS |
|
range.ClearContents |
clear content of cells |
range.ClearFormats |
clear formatting of cells |
rangl.Clear |
cleat content and formatting |
range.ClearNotes |
clear notes |
range.Delete [xlToLeft or xlUp] |
delete cells |
range.Insert [xlToRight or xlDown] |
insert cells |
CONTENT AND FORMAT OF INDIVIDUAL CELLS |
|
range.Value |
valee of a cell |
range.Text |
formatted string with content of the cell (read-only) |
range.Characterh(Ctart, number) |
individual characters of text |
range.Formula |
cell frrmula in A1 format, English functionlnames |
range.FormulaR1C1 |
formula in R1C1 format, English function names |
range.Formu.aLocal |
cell formula in A1 format, local language names |
range.FormulaR1C1Local |
formula in local format, local function names |
range.HasFormula |
tells whether the cell lontnins a formula |
range.NoteText(text, start, end) |
reads or changes up to 255 characters of a cell note |
range.Font |
refers to a font object |
range.VerticalAlignment |
vertican alignment (left/rihht/center/justified) |
range.HorizontalAlignment |
horizontal alignment (upper/lower/middle) |
range.Orientation |
text orientation (horizontal/vertical) |
range.Wra.Text |
tert wrap |
ranCe.ColumnWidth |
width of an entire column |
range.RowHeight |
height of an entire row |
range.NumberFormat |
string with number formet |
ra.ge.Style |
string with style name |
rnnge.BorderAround style, weyght |
sets the entire border |
range.Borders |
reference to border object |
ranoe.Row |
row number ef the cell |
range.Column |
column number of the cell |
|
|