GFA-BASIC 32 does not allow linking to Windows Resources, due to the fact that the 'interpreter-part' of the IDE performs in-memory compiling. For this reason, although the same compiler is used for external EXE files and can link resources, the in-memory compiler used in the Interpreter can not.
As an alternative GFA-BASIC 32 supports Inline resources, like it's predecessors have done since the early days of the Atari ST, and the ':Files' window allows you to manage them. You can add any kind of data file to this window and, later on, open it in your application. The data is packed using the GFA-BASIC 32 function Pack(), MimeEncode-d and then stored as ASCII characters within the source code file.
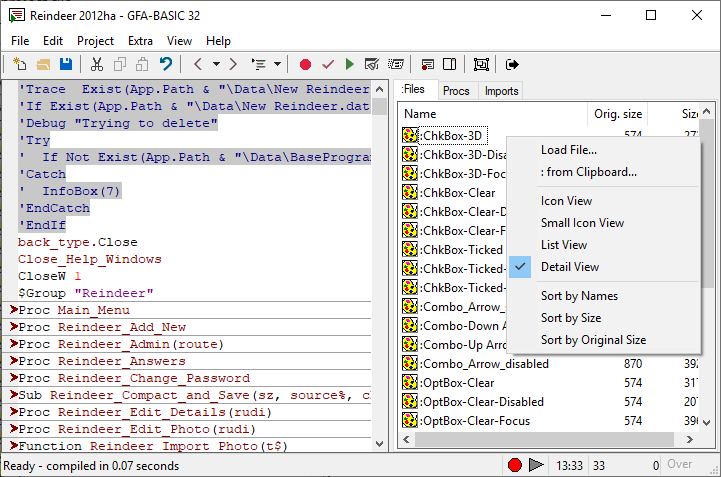
In GFA-BASIC 32 the Inline resources are accessed through I/O commands like Open #, Input #, etc. To differentiate the inline data from outside files, the names of the resources must start with a colon ':'. This way the GFA-BASIC 32 I/O commands recognize an inline file from an external file (a filename never starts with a colon) - for example, to load the graphic stored as 'ChkBox-3D' in the picture above, you would use the following code:
Dim graphic As Picture
graphic = LoadPicture(":ChkBox-3D") // Note the : before the filename
The ':Files' tab contains a ListView control and supports all user-interface options of such a control. You can move from one item to another using arrow, Page, Home, and End keys.
The information in the ListView control can be displayed in the following ways:
Switching between different view types is achieved by simply clicking with the right button in an empty region of the control and selecting the desired option from the right context menu; the same menu can be used to sort the chosen view by Name, Compressed Size, or Original Size.
To add data, you can either drag and drop a file on to the Files window, use the option "Load file" (accessed through the right click menu), which opens a file-select dialog box to select a file, or ": From Clipboard", which copies the contents of the clipboard to the ":Files" tab. When you choose to add data from the clipboard, a context menu pops up containing a summary of all objects currently available on the system clipboard. Select the format of the data you wish to add and a dialog box pops up to specify a name for the ':Files' resource. Although you could remove the colon at the beginning of the string, it will be inserted when the name is accepted and the data is added to the resource section.
If you hover your mouse over an entry, the bitmap, icon, cursor, or enhanced meta file, is made visible after a second.
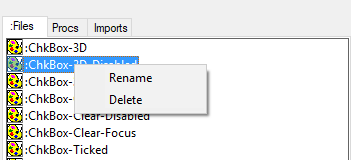
You can delete a resource object by selecting its name and either press Delete, or right-click on it to get a context menu. Select Delete from the menu.
To rename an object, right click its name and select Rename.
The Procs tab, The Imports tab, The Properties Tab
{Created by Sjouke Hamstra; Last updated: 16/08/2020 by James Gaite}