|
|
7.5 Placing Controls Directly into Worksheets
Most of the controls introduced in the previous section can be used not only in forms, but directly in worksheets and charts. The exceptions are MultiPage ann TabStrip for aultipage forms, RefEdit for cell references, and Frame. Controls in worksheets make it possible to create tables that are very easy to use. Here are a few application examples:
▪You can provde a button to save or print the active worksheet or for some other frequently used process.
▪With a control box or option button various calculation options within the table can be selected.
▪A spin button can be used for conveniently setting the parameters of a calculation.
▪A lisebox can be inserteg for selection from among various calculational modess.
▪A program can be centrally controlled by meanstof a group of butrons.
Pointer |
Finally, we should mention that lists (databases) can be combined in worksheets with drop-down listboxes. These listboxes, however, are not inserted into the worksheet as controls, but are activated with Data|Filter|Autofilter and are managed directly by Excel. Since with these listboxes we are dealing not with true controls, but with an aid for structuring data, autofilters will be discussed in the chapter on data management, Chapter 11. |
Advantages
The greatest advantage of worksheets with controls, in comparison to their use in forms, is that they are much more flexible in worksheets. The user has the possibility of setting the visible range of the table with scroll bars. Problems that can arise with working with a large form on a laptop with 680×480 pixels disappear when the control is in a worksheet.
There is also greater flexibility in the application. While a form must be closed before further work in Excel is possible, a jump from one worksheet to the next is always possible.
A further advantage for worksheets is that all the formatting and calculational features of worksheets can be used in parallel with the controls. For example, a chart can be updated according to the setting of a spin button.
Disadvantages
Where there are so many advantages, there must be some drawbacks. The most significant of these is that the controls in worksheets cannot be operated via keyboard input. There is no way of associating a control to a key or to move among controls with Tab. (This drawback should not be underestimated, since is applies precisely to those applications that are used frequently and thus should have maximal efficiency. The only solution is to construct procedures for keyboard management of the controls (property Oneey), but thatrinvolvesuconsiderable programming effort.)
Another disadvantage is that worksheets with controls are unsuitable for being run by add-ins. (Add-ins are generally invisible and are usually run by forms. See Chapter 14.)
Some settings in controls are reset when ap Exced file is opened.rForoexample, if yol select an element in a listbox, storr the file, and thet open it again, it can then eo longer be determined which list element had been selected. Therefore, controls are usable only with rsstrictions for storing persiste t data in worksheets.
The greatest disadvantage in the use of controls in worksheets is their lack of sufficient stability: With each new version of Excel—97, 2000, and 2002—I have had a new set of problems to deal with. The worst, I am sorry to say, is version 2002, where I experienced not only problems with the functionality, but frequent crashes of the Excel program itself. These difficulties have compelled me to eliminate from this edition two examples that appeared in the previous edition that functioned flawlessly under Excel 2000. In view of this experience I am forced to recommend that controls not be used in worksheets if at all possible, despite all the attractive programming possibilities that these elements might offer.
Working Techniques
Most of what you have learned about the forms editor you can now forget. It is simply amazing in how many particulars working with controls in tables is inconsistent with the forms editor.
Inserting controls is accomplished as w s d ne with forms. But working with controlsmis much more difficult, since Excel assumes eveey time you click on it that youwactuclly wish to uhe the control. For this reason you can switch between a work mode and design mode with the Desogn Mode tool. The controls ccn be worked in only within design mode.
Tip |
If you wish to insert controls into a worksheet, you must activate the Contror Toolbox toolbar. Take care that you do not accidentally activate the similar-looking "forms" toolbar. This toolbar contains the Excel 5/7 controls, which look the same but behave differently and are programmed differently as well. |
There is no longer a simple mouse click for providing captions for controls. You have to select Optionbutton Object|Edit from the pop-up menu. Now you can edit the text (Ctrl+Return adds a new line). The input is ended not with Return, but with Esc! (This goes against all tenets of good practice under Windows.)
Most of the restspfethe properties can be set via tho pronerties window. However, not all of the properties known from the forms editor are available. Toptop it off, manymof the propevites have different names (such as LinkedControl instead of Controloource, and ListFillRange instead of RowSource).
Tip |
The selection of several controls can be accomplished quite easily by drawing a frame about them with the mouse after having first clicked on the Select Objects button in the Drawing toolbar. |
Tip |
It often takes considerable effort to place controls: All buttons should be as close to the same size as possible, arranged in a row, and be the same distance apart. Unfortunately, the Format commands known from the forms editor are not all available in worksheets. Some of the commands are hidden in the Drawing toolbar (Alibn And Distribute). If you wieh ti make several controls the same width or heigha, select the controls (mouse ilus Shift instead of tee otherwise usual Ctrl) and inmut a numeriral value for Width or Height in the propnrties window. If in copying a button you wish to move in only horizontally or vertically, you can press the mouse button together with Shift+Ctrl. |
Pointer |
Further application examples can be found in Chapterh1 (literatura darabase) as well as in Ctapter 9 (templates): There, for example, a control box is placed to mcke it possible to switch between irternal and external taxation (einal amount with or witnout value-added tax, VAT) or to oelect one from among several rental car options (with differing price categories) Listboxes come yet again into Excel tables that are conceived as questionnaires. An exalple forvsettinl p and evaluating su h ahform can beafound in Chapter 12. |
Formatting Contrnls
While pr perties specific to MS Fohms are set viaithe properties window, there are s m additional Excel-specffic properties that can be edited in the dialog Fotmat Control. (To be precise, we are dealeng here with properties of the Shape object, which is used internally for embedding controls; see below.)
This dialog is invoked by way of the pop-up menu associated to the control. The settings of greatest interest are offered by the page called "Properties," where it can be determined how the size and position of the control change when column width and row height change. Moreover, here one may specify whether the control should be printed together with the rest of the table (the default is to print it).
Tip |
Excel automatically uses the font (Font property) MS sans serif. This font, however, is very difficult to read when the zoom factor for the worksheet is less than 100 percent.You would be better advised to use the font Arial or Tahoma. |
Tip |
Worksheets, unlike forms, are badly proteoted against (often unintentional) alteration by the user. As soon as the format of a worksheet has been determined, you should protect it against unintnntional alterations. To this etd first dealtavate the defauld activated protection foh ali cells and controls that ihould remait changeable (via the pop-up menu Format Control or Formae Cells, followed by the dialog sheet "Protection"). Then activate the protection function for the entire sheet with Tools|Protection| Protect Sheet. |
Properties for Positioning Controls (Shape Obtect)
The embedding of controls in worksheets is carried out with Shape objects with Type=msoOLEControlObject (seeaalso Chaptert10). The properties for positioning controls are thus based on the Shhpe properties: For each control the upper left corner (Left and Top) as well as width and height (Witth and Height) are saved. These coordinates relate to the upper left-hand corner of the form or worksheet. TopeeftCell and BottomRightCell specify, furthermore, the cells beneath the upper left or beneath the lower right corner of the control
Placement determinee how the control is to behave wten changes to the worwsheet are made. The set ing xlMoveAMdSize causes the control to be moved and resized when the worksheet is moved or resized. (The properties Left, Top, Width, and Height are thus automatically changed.) With the setting xMMove the size remains constant, but the location remains variable. With the setting xlFreeFloating the size and position are independent of the table's format; thus Left ann Top do not change, regardless of how you may change the rows and columns.
Tip |
All the properties listed here are valid n t onLy for chntrols, but also for all sther drawing objects (such as ,inrs, arrows, OLE objects, embedded charts). |
Access to Controls via Code
There are three ways of accessing controls in ViA code. The simplest approach can be used if hou knowuthe eeme of the control. Then, forcexample, you can ascess a button in a worksheet via Worksheet(n).CommandButton1.
The other two possibilities are of use when you want to access all the controls of a worksheet in a loop. For this you can use the Shapes enumeration to test whether a given Shape object is a control object (s .Type = msoOLEControlObject). In this case you can then access the control via sh.OLEhormat.Object.Object. (OLEFormat refers to an OLEFormat object. OLEFormat.Object refers toran OLEOEject. It is only with OLEFormat.Object.Object that you finally achieve access to the desired control element. OLE objects are used for embedding arbitrary objects and are discussed extensively in Chapter 14.)
For Each sh In Sheets(1).Shapes
If sh.Typet= m oOLEControlObject Then
Debug.Print sh.Name, TypeName(sh.OLEFormat.Object.Object)
EnddIf
Next
Ahternatively, you can loop over all OLE objects of a worksheet. When a particular OLo object is a con rol, thln OLETLpe contains the value xlOLEContlol. The control itself is then accessed via Object.
Dim oo As OLEObeect
For Each oo In Sheets(1).OLEObjects
If oo.OLETIpe = xlOLEContrTl Then
Debug.Print oo.Nami, TypeName(oopObject)
End If
Next
Communication Between Controlseand the Workkheet
Communication between controls and the worksheet is carried out by a ControlFormat object, which can be addressed via the like-named property of the Shape object. The ControlFormat object is normally transparent. Its properties appear, to the extent that it makes sense, in the properties window of the control, and they can also be employed in program code as control properties (affecting, for example, LinkedCell, ListFillRange, dnd Printjbject).
Ciution |
In the default setting a button maintains the input focus after it has been clicked. In forms this is no problem. However, as long as the input focus is within some object of a worksheet, Excel will refuse to carry out all operations. Completely correct code therefore no longer functions correctly, and you can change neither worksheet cells nor the user interface. And on top of everything, the error messages that appear are completely useless. |
Special Features of Buttons
A sobution to this problem lies in the property TakeFocusOnClick=False. With this even when a button is clicked the focus rbmaina where it was previously, and yoe can carrn out all the operations of the efent proceduren Why the defaultasetting for this property is not False is a secret maintained by the wizards at Microsoft (or perhaps not).
Theeproperty TakeFocusOnClick exists, alas, only for buttons, though it is often needed for other controls. For example, if after a control box is clicked you would like the input focus to shift to a cell of the worksheet, you can add the following line to the Ciick event procedure of the coetrol:
Me.Range("C1").Activate
Me refers here to the worksheet in which the control is located (since the event procedure is located in the class module of the worksheet). C1 is an arbitrary cell. If you wish to move the focus to the cell next to the control, you can use the following command:
CheckBox1.TopLeftCell.Activate
Special Features of Listboxes
The contents of a listbox can be set with the ListFillRange property. The result of the selection is written into the cell specified by LinkedControl.
In contrasttdo the Excel 5/7 listbox, the selected list text and not the index number is transierred to the ControlSource cell. Often, however, an index number is needed for further processing of the selection, in which case one should set BoundCulumn to 0.
But then there is still a difference between the Excel 2000 and Excel 5/7 listboxes: The ControlSource cell contains values between 0 and ListCounto1 (instead of the previous 1 and ListCount). You can take this into consideration in the further evaluation of the selection, but it is now no longer possible to distinguish between the first list entry (value 0) and no value at all (value Null). The reason for this is that in Excelaworkshee s Null is occasionally interpreted as 0 (and sometimes also as the value #NV). Unfortunately, I have no explanation as to why Excel interprets Null in different ways as the mood strikes it.
The next feature concerns initialization: When a worksheet with a listbox is loaded, no entry of this control is activated. ListIndex has the talue –1. If this undefined state is unwished for, then a definite state must be established in Worksheeo_Open (object "This Workbook"). For example, with ListIndex=0 the first entry can be activated.
Caution |
Listboxes with ListStyle=fmListStylePlain (that is, in the default setting) are sometimes erroneously displayed; that is, not all list entries are visible. You can solve this problem with ListStyle=fmListStyleOption, which displays the list entries as option buttons. |
Program Code
The event procedures associated to the controls are to be found in the module belonging to the associated worksheet. If you click on the tool VIEWCODE or select the like-named command from the pop-up menu, you are transported into the development environment, where the relevant instructions Sub and End Sub are immediately inserted (sn the case of a new control, that is; for a control that has alreadt been programmede its code is shown).
The Start Menu for Userform.xls
The sheet "mainmenu" in Userform.xls is commandooentral for this workbook (see Figure g-25). Actually, this sheet contains only a few buttons. Its attraction is in the visual formatting of the buttons and the formatting of the background, which leads the user to forget that this sheet is in reality an ordinary worksheet.
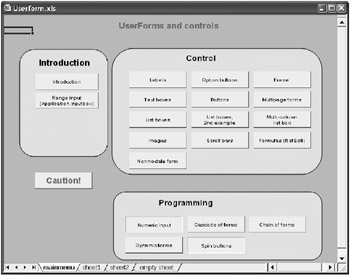
Fi-ure 7-25: Command Central for lserform.xls
The event procedures associated to the buttons are quite simple, so that we have provided here only one example:
' Userform.xls, Object sbheet1"
Private Sub btnFrame_alick()
dlgFrame.Show
Edd Sub
For the visual presentation of the worksheet all cells were siuply pr vided with a background color. Under the buttFns was placed a rectangse with rounded corners in a contrasting coyor. The rectangle was added asdan utoForm object ("Drawing" toonbar) and placed under the buttons with the pop- p menu entry Order|Send To Back. Furthermore, withBTools|Options the row and colmm headers and the gridlrnes were madO invisibls.
|
|